August 2024
|
Time to read 6 min
|
Time to read 6 min
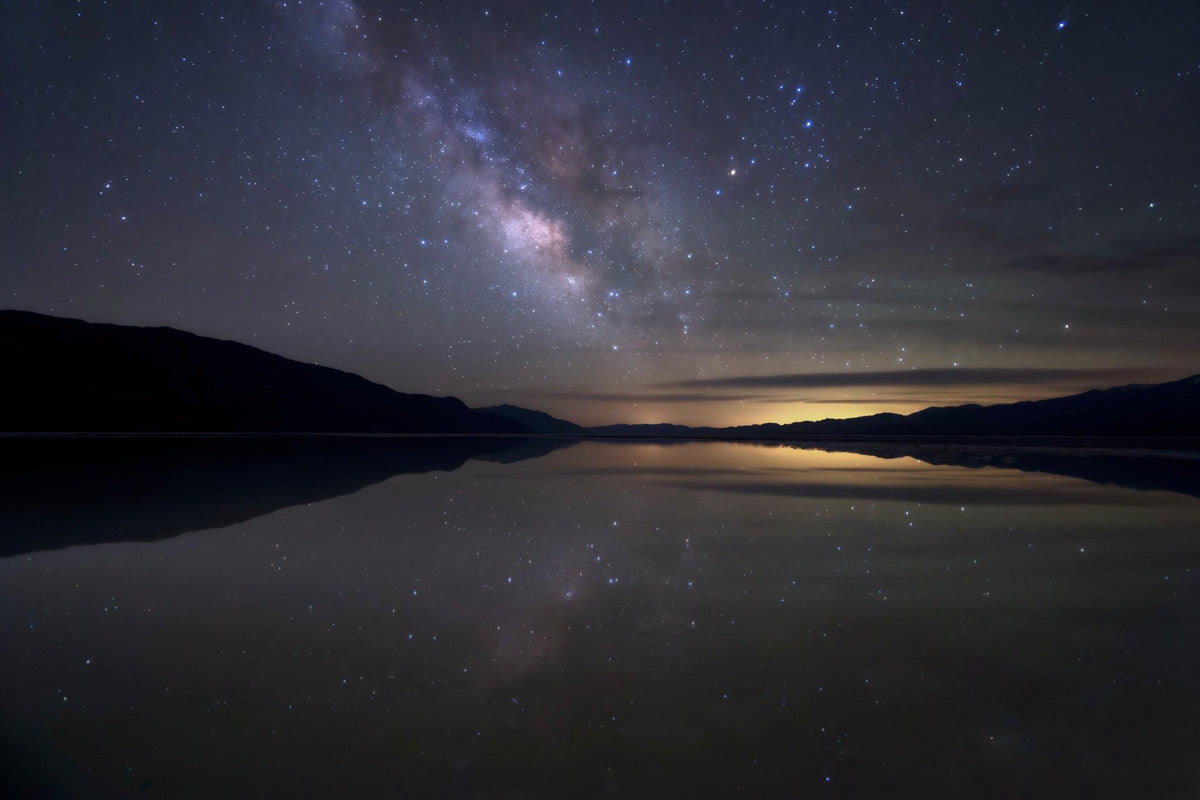
Dear Angie,
Great question! Capturing the Milky Way can be challenging, but with the right techniques, you can create stunning night sky images. Here are some key tips to help you get clearer, less grainy Milky Way shots:
The NPF rule is a more precise method for calculating maximum exposure time to capture sharp stars without trails. It takes into account factors like sensor size, pixel density, and declination of stars. Here's how to use it with PhotoPills:
a) Download the PhotoPills app if you haven't already.
b) Open the app and go to the "Spot Stars" calculator.
c) Input your camera model, lens focal length, and aperture.
d) The app will calculate the maximum exposure time based on the NPF rule.
This method provides a much more accurate exposure time than the old 500 rule, helping you capture sharper stars.
a) Adjust white balance to neutralize any color casts (typically around 3900K).
b) Increase contrast and clarity to make the Milky Way pop.
c) Use the dehaze slider cautiously to enhance galaxy details.
d) Selectively reduce noise in the sky using the brush tool.
e) Slightly increase shadows to reveal foreground details.
Remember, perfecting Milky Way photography takes practice. Don't be discouraged if your first attempts aren't perfect. Each session is a learning experience, helping you refine your technique.
For hands-on experience, consider joining one of our night photography workshops where we dive deep into these techniques in the field. We'll show you how to use tools like PhotoPills effectively and help you master the art of capturing the night sky.
If you're looking for a comprehensive resource to further your nightscape photography skills, I highly recommend checking out my ebook, " Nightscape ." It provides a much more in-depth discussion of the techniques we've touched on here, along with advanced concepts and creative approaches to capturing the night sky. The ebook is packed with practical tips, real-world examples, and detailed explanations that will help take your Milky Way photography to the next level.
Keep shooting for the stars, Angie!
Best,
David
Dear Mike,
Balancing exposure in high-contrast landscapes, particularly during sunrise and sunset, is indeed a common challenge. Here are some strategies I use to manage these challenging lighting situations:
Take multiple exposures of the same scene at different exposure levels, typically one for the sky, midtones, and shadows. Then, use HDR techniques to blend these exposures in post-processing. Lightroom's HDR merge feature is excellent for this, allowing you to create natural-looking images that balance bright skies with darker foregrounds.
Modern cameras have impressive dynamic range, especially when shooting in RAW. Expose for the highlights without clipping and recover shadow details in post-processing. This can often capture the full range of tones in a single exposure.
Stick to your camera's base ISO to maintain the highest dynamic range your sensor is capable of capturing.
Keep an eye on your camera's histogram to ensure you're capturing the full range of tones without clipping highlights or shadows.
Use adjustment brushes or graduated filters in Lightroom to selectively adjust exposure, highlights, and shadows in specific areas of your image.
Try turning around and shooting away from the sun. This often yields softer, more even light, reducing extreme contrast. The warm light will beautifully illuminate your subject without the harsh contrast of shooting directly into the sun.
Remember, the goal isn't always to have every part of the image perfectly exposed. Sometimes, allowing some areas to fall into shadow or highlight can create mood and depth in your sunrise/sunset landscape.
In our workshops , we practice these techniques in the field, providing hands-on experience with challenging light. For more in-depth post-processing techniques, check out the Lightroom tutorials on our website.
Keep experimenting, Mike. With practice, you'll develop an intuitive sense for handling even the most challenging lighting conditions.
Happy shooting!
David
Dear Nathan,
Conveying scale in wide-angle landscape shots is a common challenge, but with the right techniques, you can create images that truly capture the grandeur of a scene. Here are some composition tips I've found effective:
Incorporate a natural element in the foreground or middle ground that's common in landscapes. This could be a lone tree, a boulder, or a small clump of wildflowers. These elements give viewers a point of reference to understand the scale of the larger landscape.
Utilize natural lines in the landscape to draw the viewer's eye from the foreground to the background. This can be a river, a ridge line, or even a line of trees. This technique helps create depth and emphasizes the expanse of the scene.
Compose your shot with distinct foreground, middle ground, and background elements. This creates a sense of depth that can enhance the perception of scale.
Get low and close to foreground elements. This exaggerates their size relative to the background, creating a more dramatic sense of scale.
If you're faced with a cloudless sky, try waiting for twilight and face the opposite direction of the sun. This allows you to include the Earth's shadow as an interesting element in the sky. The gradient of colors from the Earth's shadow can add depth and interest to your image, enhancing the overall sense of scale and grandeur.
Frame your main subject with elements in the foreground, like tree branches or rock formations. This can provide context and enhance the perception of distance and scale.
Sometimes, stepping back and using a longer focal length can actually enhance the sense of scale by compressing the scene and making distant elements appear larger.
Remember, conveying scale is as much about what you include in the frame as what you exclude. Don't try to capture everything; sometimes, focusing on key elements that tell the story of the landscape's size can be more effective than trying to fit it all in.
Experiment with these techniques and see how they work for your specific scenes. Over time, you'll develop an intuitive sense for composing images that truly capture the grandeur of the landscapes you're photographing.
If you're interested in diving deeper into composition techniques, consider joining one of our landscape photography workshops . We spend a lot of time in the field practicing these concepts in various landscapes.
Keep shooting and exploring, Nathan. The more you practice, the more natural it will become to compose images that convey the true scale and majesty of the landscapes you encounter.
Best regards,
David
Lorem ipsum dolor sit amet, consectetur adipiscing elit, sed do eiusmod tempor incididunt.
Add $40 to get a 10% off on total price


