No products in the cart.

Over the years I’ve dabbled with many different techniques to achieve proper focus at night
Hyperfocal
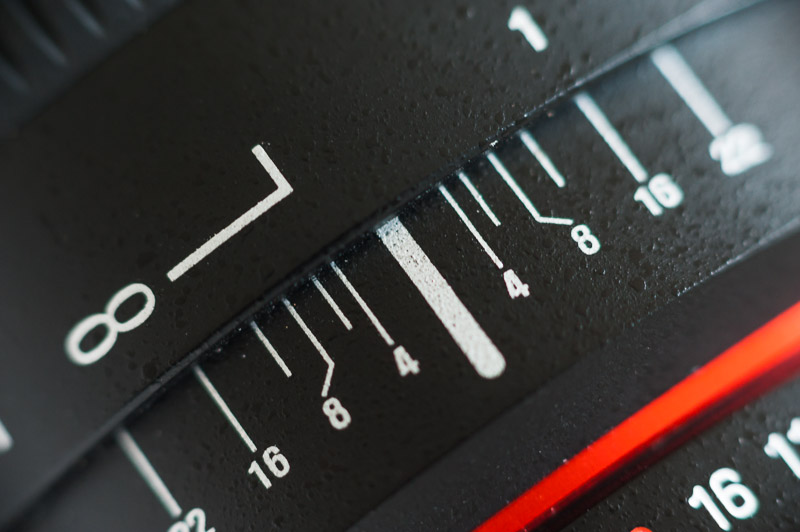
This has become my go-to method that is quick, easy and accurate for prime lenses, which is all I shoot with at night now. On prime lenses you’ll find markings that coincide with your aperture. To set hyperfocal simply set the infinity mark to align with your selected aperture. Below is an example of the Rokinon 24mm f/1.4 set to the hyperfocal distance for f/4. There are no markings below f/4 so you have to eyeball it between f/4 and the center white line.
Anything from half the hyperfocal distance to infinity will be in focus, for example here are my common lenses and apertures I use with them. I calculated these using DOFMaster, you’ll want to do the same for your camera/lenses.
|
Lens
|
Aperture
|
Hyperfocal
|
In Focus
|
|---|---|---|---|
| 14mm Rokinon | f/2.8 | 7.62′ | 3.81′ – Infinity |
| 15mm Sigma Fisheye | f/2.8 | 8.75′ | 4.37′ – Infinity |
| 24mm Rokinon | f/2 | 31.6′ | 15.8′ – Infinity |
| 35mm Rokinon | f/2 | 67.1′ | 33.5′ – Infinity |
As you can see with a very wide lens we have lots of flexibility even at f/2.8. On the 14mm everything from 3.81′ to infinity will be in focus. 35mm is still a fairly wide angle, but now we have to be 33.5′ away from our foreground subject to have it and the stars in focus.
So what are we to do when we have a foreground subject that is closer than the hyperfocal area? Normally you would stop down to get more of your scene in focus, but with night photography we need to leave the aperture open as wide as possible to collect more light. In some instances it may be possible to stop down and raise the ISO to compensate, but you will need a very capable camera like the Nikon D4 or the Canon 1D X that can comfortably go up to ISO 12,800. For example lets say you were using a 24mm at f/2; you can only be within 15.8′ of your subject, but for your composition you need to be 10′ away, based on the calculator f/4 would make everything from 10.5′ – Infinity in focus. That is 2 stops of light you just lost though, so you would need to raise the ISO 2 stops, from 3200 to 12,800 for example. You can see this can quickly lead to problems if your camera doesn’t have massive ISO capabilities.
So stopping down is generally out of the question, now what? My preferred method is to take 2 shots and focus stack; I take one shot at hyperfocal to get the stars sharp, then I take another shot with the foreground in focus, I will then manually blend the two exposures in Photoshop using layer masks. See below for foreground focusing techniques.
This is all fine and dandy for prime lenses, but what about zooms? Modern zooms have completely abandoned hyperfocal markings, and to make matters worse the distance markings are pitiful, making it very hard to set an accurate hyperfocal distance. One option is to look up your hyperfocal distance on your smartphone using DOFMaster or write down common settings in advance. Then take a small flashlight, step off the hyperfocal distance in front of your camera (one stride is about 3′) and point the flashlight back at the camera, then use live view to focus on that point of light (a friend is helpful here, but you can also set it on the ground).
Another thing to consider if you know you won’t be changing your focus throughout the night is to set the hyperfocal distance in advance and tape down the focus ring with gaffer’s tape (this tape leaves no residue behind, highly recommended!) this way you won’t inadvertently change your focus when composing or changing lenses.
Still confused by hyperfocal distance? Here’s a good article from PictureCorrect that I ran across which explains it better than I can.
Live View
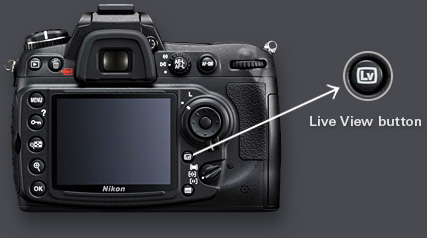
Using live view is a great option to get your stars in perfect focus. Start by setting your focus to infinity to get relatively close, then turn on live view and zoom in on a bright star (using the zoom buttons, not zooming your lens), now manually turn your focus ring, you will see the star turn into a blob of light when it goes out of focus, simply dial this in until the star is a sharp point of light. What I have found is that this perfect focus is almost always the hyperfocal distance as well, and has been a very reliable method for me. This method will fail on occasion with a 2.8 or worse lens combined with stars that are not exceptionally bright.
Infinity
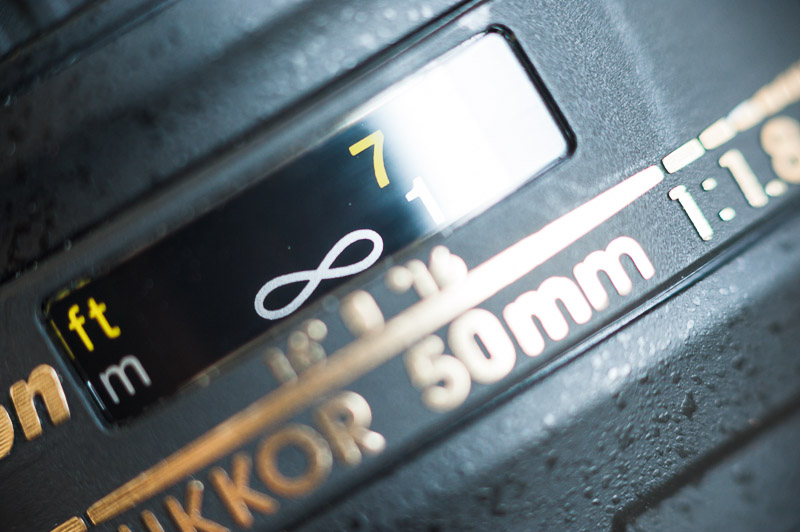
This method is ultra simple and works decent in many situations. Just set the lens to infinity, that’s it, your done. With certain lenses this works great, for example the Nikon 24-70 is great at infinity, but the Rokinon 24mm is much sharper at the hyperfocal distance. This is a good method for newbies that have too many things to think about when starting out. Don’t feel bad if you fall back to this method, I did for a long time and it worked out fine, but when you get comfortable with night shooting, switch it up to hyperfocal for the utmost quality.
Foreground
The simple method for focusing on a foreground subject is to turn on live view, shine a flashlight on your subject and use live view to adjust your focus. You can do the same by shining a green laser on your subject and focus on that point of light if you don’t have a bright enough flashlight. I would only suggest this method if you’re going to be focus stacking though, when focused on the foreground subject your stars will be out of focus. To get both in focus you will have to fall back to the hyperfocal method, which may require you to move farther away from your subject, which you would need to step off to find the distance. Then take a test shot and check to see if your subject is in focus, if not move a little further back and take another test shot. Remember that it’s not always necessary to re-focus for your foreground with wide angle lenses, most of the time everything will be in focus due to the hyperfocal setting. It’s worth stepping off first to make sure you’re far enough away.
