No products in the cart.

UPDATE: Since I’ve written this my friend has produced a Photoshop script to automate this process, see the Waguila Stacker. If you prefer to do it manually or want a little more control, read on.
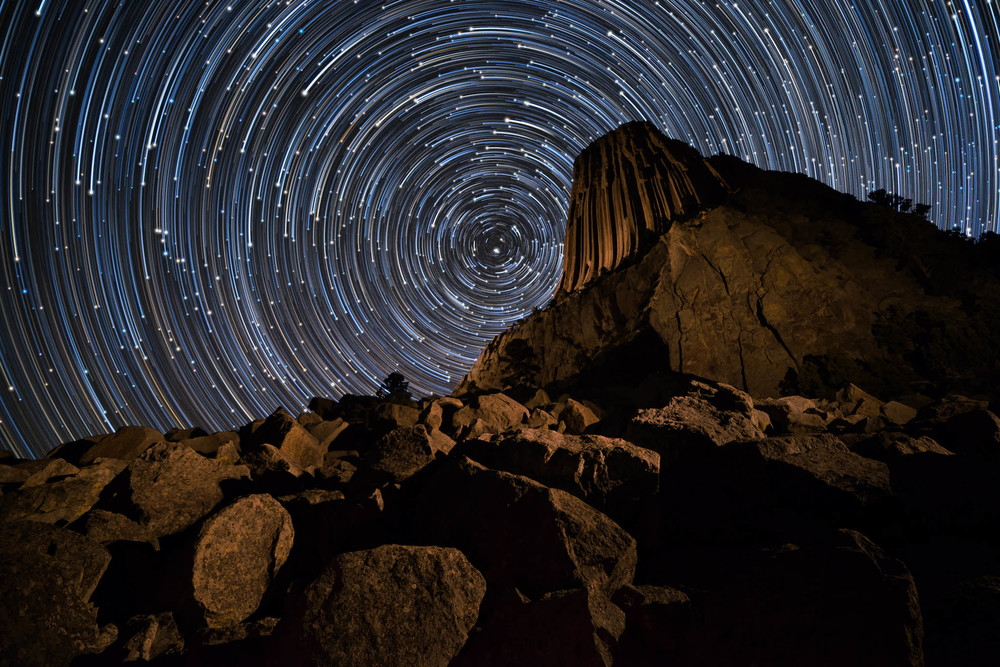
I’ve seen a few very unique images recently that turned star trails into what almost look like a sky full of comets, yet none of them shared their methods. This really disappointed me as I firmly believe that sharing knowledge helps us all improve together as a group. So without further ado, here is my method.
First off the method for shooting is exactly the same as for making star trails, the key is to use the stacking method versus one long exposure. There is plenty of information out there so I won’t be covering this; you can visit Steven’s great site to learn more star trails and night photography
Next, we need to stack the images to create star trails, for this I recommend using Steven’s Star Stacking Action, but we have to modify it slightly so we end up with the individual layers rather than a flattened image. After you install the actions, open the actions panel, expand Star Circle Academy Stacker, duplicate “Load and Stack in LIGHTEN Mode (Recommended)”, in the copy of this delete the step ‘Flatten Image’. Follow his instructions, the only change is when you are at the batch step you will select this copy of load and stack.
Now we have a bunch of layers that have their blending mode set to Lighten, I’m sure many of you have already figured out by now that all you need to do is change the opacity of each of these layers to be progressively more opaque. In my image I had 20 layers so I set each layer 5% apart; for example 95%, 90%, 85%, etc. This creates the trailing off that looks so cool. I’ve found that around (50) 30 second exposures looks very nice.
Finally to get the bright star with the spikes at the end of the trail I used the amazing plugin Star Spikes Pro which has an incredible amount of flexibility. I applied this only to the background layer (which I duplicated of course) I’m sure some won’t like the spikes but I don’t really care, this is art.
That’s it! It’s quite simple actually, the only thing that took a long time was cleaning out all the planes from different frames. I found that using layer masks and leaving all the layers on made this a lot simpler than trying to clean up each frame individually cloning because then you can see what effect it’s having and you can be much less anal.
I hope this helps some of you out, and I want to see your results! I know I’ll be putting this to good use in the near future as I plan to get out a lot more. Please feel free to re-share this and ask any questions.
Keywords: comets, galaxy, milky way, night tutorials, post processing, star trails, stars
